Crafting A Pie Chart In Minecraft: A Information Visualization Odyssey
Crafting a Pie Chart in Minecraft: A Information Visualization Odyssey
Associated Articles: Crafting a Pie Chart in Minecraft: A Information Visualization Odyssey
Introduction
With enthusiasm, let’s navigate by way of the intriguing subject associated to Crafting a Pie Chart in Minecraft: A Information Visualization Odyssey. Let’s weave fascinating info and provide contemporary views to the readers.
Desk of Content material
Crafting a Pie Chart in Minecraft: A Information Visualization Odyssey
Minecraft, the enduring sandbox sport, is famend for its inventive freedom and limitless potentialities. Whereas not inherently designed for information visualization, its block-based nature and in depth modding neighborhood surprisingly provide avenues to symbolize advanced info, even one thing as seemingly subtle as a pie chart. This text explores numerous strategies, from rudimentary guide constructions to using superior modding methods, to show how one can create a pie chart in Minecraft, catering to completely different ability ranges and desired ranges of accuracy.
I. The Guide Technique: A Blocky Approximation
For novices or these looking for a easy illustration, a guide strategy utilizing coloured wool or concrete blocks provides a readily accessible resolution. This methodology sacrifices precision for ease of creation, however can successfully talk primary proportions.
A. Planning the Chart:
-
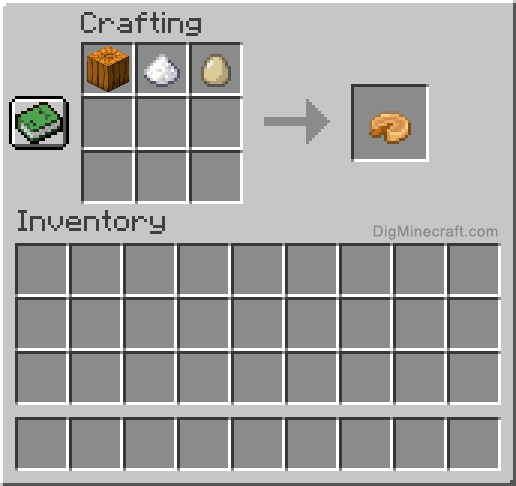
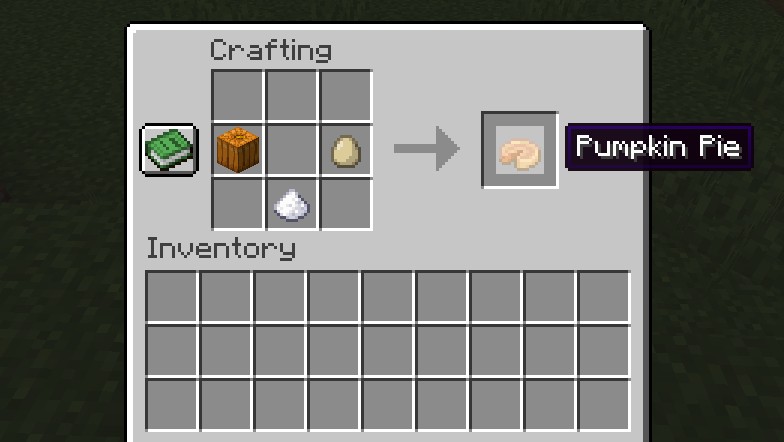
Information Preparation: Start by defining the information you want to symbolize. As an example we’re visualizing the distribution of various kinds of bushes in a forest: Oak (40%), Birch (30%), Spruce (20%), and Jungle (10%). Convert these percentages into approximate block counts. For a chart with a complete of 100 blocks, this interprets to 40 Oak, 30 Birch, 20 Spruce, and 10 Jungle blocks.
-
Form Willpower: Select a easy form in your pie chart. A circle is right, however squares or different polygons can work too, although they are going to be much less visually consultant of a pie chart. The chosen form’s space will dictate the general dimension of your chart.
-
Section Calculation: Divide your chosen form into segments proportional to your information. For a circle, estimate the angles. A 360-degree circle has 40 levels representing 10% (360/10 = 36). Due to this fact, Oak would occupy 144 levels (40% * 360), Birch 108 levels, Spruce 72 levels, and Jungle 36 levels. This estimation does not must be excellent; visible approximation is enough.
B. Building:
-
Base Creation: Assemble the bottom of your pie chart utilizing a cloth like cobblestone or a visually impartial block. This acts because the background.
-
Section Constructing: Utilizing the calculated block counts and colours akin to your information classes (e.g., brown wool for Oak, white for Birch, inexperienced for Spruce, and inexperienced for Jungle), meticulously fill within the segments. This requires cautious placement to approximate the angles or areas.
-
Labeling: Add labels to determine every section. Use title tags positioned strategically close to every part to point the class (Oak, Birch, and many others.). You would use indicators for extra detailed info, together with percentages.
C. Limitations:
The guide methodology’s major downside is its inaccuracy. Exact illustration is difficult, particularly with extra information classes or smaller percentages. The visible attraction can also be restricted by the blocky nature of Minecraft.
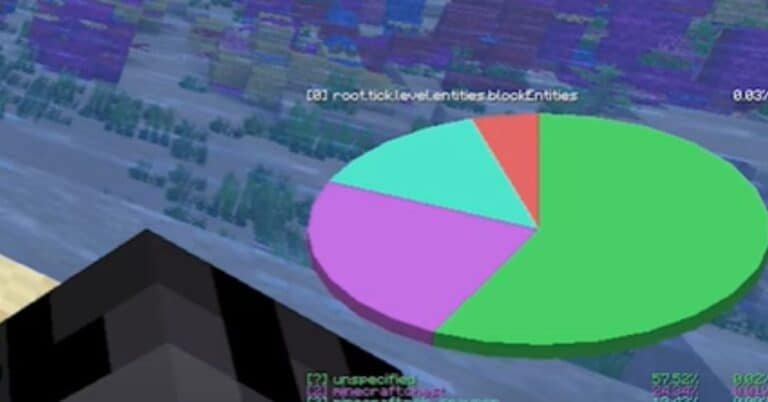
II. Leveraging Redstone and Command Blocks: A Extra Exact Method
For a extra correct pie chart, harnessing Redstone circuitry and command blocks provides a big enchancment. This methodology requires a deeper understanding of Redstone mechanics and command block syntax.
A. Information Storage:
-
Scoreboard System: Use the Minecraft scoreboard system to retailer your information. Create goals for every class (e.g.,
oak,birch,spruce,jungle) and assign scores representing their values. -
Whole Calculation: Create one other goal to calculate the entire sum of all classes. This may be achieved by way of a easy scoreboard operation summing up the person class scores.
B. Angle Calculation:
This step requires a complicated Redstone system to calculate the angle for every section based mostly on its proportion to the entire. This sometimes includes:
-
Division Circuitry: Implement a Redstone circuit to divide every class’s rating by the entire rating, successfully calculating the share. That is computationally intensive and requires superior Redstone data.
-
Angle Conversion: Convert the share into an angle (levels) utilizing additional Redstone calculations or lookup tables.
C. Block Placement:
-
Round Construction: Create a round construction utilizing blocks. This construction will function the canvas in your pie chart.
-
Conditional Block Placement: Use command blocks to conditionally place coloured blocks throughout the round construction. The command blocks will use the calculated angles to find out the exact location and extent of every section.
D. Limitations:
Whereas this strategy is extra correct than the guide methodology, it is considerably extra advanced to implement. It calls for superior Redstone data and cautious planning. The precision remains to be restricted by the blocky nature of the sport; sub-block precision is not attainable.
III. Modding: The Final Resolution
Minecraft’s modding neighborhood supplies essentially the most highly effective and correct resolution for creating pie charts. Mods that combine information visualization instruments or provide customized block rendering capabilities can generate extremely correct and visually interesting charts.
A. Discovering Appropriate Mods:
Search the Minecraft modding neighborhood (e.g., CurseForge, Modrinth) for mods that supply information visualization or customized block rendering. Search for mods that particularly assist pie charts or enable for creating customized block behaviors to simulate pie chart segments.
B. Integration and Configuration:
The precise steps for utilizing a mod will rely upon the chosen mod’s documentation. Typically, this includes:
-
Information Enter: Enter your information into the mod’s interface, both manually or by way of exterior information recordsdata.
-
Configuration: Configure the chart’s look (colours, labels, dimension, and many others.).
-
Rendering: The mod will then render the pie chart in-game, utilizing both customized blocks or subtle rendering methods.
C. Benefits:
Modding provides essentially the most exact and visually interesting resolution. Mods can deal with advanced datasets, generate correct representations, and provide customization choices far past what’s attainable with guide or Redstone strategies.
D. Limitations:
Modding requires putting in and configuring mods, which might not be appropriate for all gamers. Mod compatibility points also can come up.
Conclusion:
Making a pie chart in Minecraft is a difficult however rewarding endeavor. The selection of methodology depends upon your technical expertise and the specified stage of accuracy. Whereas the guide methodology supplies a easy introduction, Redstone circuitry provides a extra exact (although advanced) strategy. In the end, modding presents essentially the most highly effective and visually interesting resolution, permitting for extremely correct and customizable pie charts. Whatever the chosen methodology, the journey of crafting an information visualization throughout the Minecraft world highlights the sport’s surprising versatility and the inventive potential of its neighborhood. The method itself, from information preparation to remaining rendering, is a testomony to the limitless potentialities inside this digital sandbox.


Closure
Thus, we hope this text has supplied priceless insights into Crafting a Pie Chart in Minecraft: A Information Visualization Odyssey. We thanks for taking the time to learn this text. See you in our subsequent article!